Showing posts with label arts and crafts. Show all posts

Saturday, October 19, 2013

DIY - print your own typographic t-shirt!

Hey there,

Seems like it's been a while! I figured since I haven't posted something in so long it would be nice if I could share my project that I am working on right now for my shop - hand-printed T-shirts!

They are incredibly easy, but they take time and require a bit of effort. 

Print your own t-shirts like this!
So I had several designs for my crop t-shirts, which I was trying to experiment with typography. This DIY guide only applies to text by the way - If you want an image with lots of colours I can't give you that! Contact your local craft store or ask around to get your t-shirts printed instead :)


Export the text to an image (.png)
Now here are two ways to cut the text - using an x-acto knife and using a laser printer. Since my school provides the second option for art students, this was what I used. 

First you load the image file onto 2D design. Then do the proper settings (vectorize bitmap, explode, line colour/fill for cutting) and print out with the printer. The laser will cut the outline of the text and this means the letters will fall out leaving empty spaces. 

Before printing - note that I used two A4 sheets because it didn't fit one :)
However, if you don't have access to the laser printer like I do, simply print out the text onto A4 paper that is adequately thick for easier manipulation and less messy cutting. Then use the x-acto knife to cut out your outlines.

After you have the outline - go ahead and put your shirt onto a flat surface. Preferably a board or table or something. 


Then use a few sheets of A3 paper to layer under the side you're printing on - this step is very important, because if you don't paint will leak through and dirty the other side of your shirt!


Align your painted/extracted outline text onto the shirt, wherever you want it to be. Tape it down to secure it on the shirt so it won't move around.


Don't forget the little insides of the text too! If you didn't save them like I forgot to... make some out of sticky paper and stick them on there. Otherwise double-sided tape goes well too!


After that you can start painting on your t-shirt! You can use fabric paint or here, I used acrylic paint because it was more available to me.


Keep "printing" it and fill in the blanks! I used two colours like my original design.


After you finished - go ahead and peel the paper off. Gently though - you don't want the paint to smudge all over if it is not dry yet!


The thrill of removing all of the stickers is absolutely exhilarating.
Voila! There you go. Easy, right? That took me at least 30-40 minutes for each shirt though. So yes, it takes effort, but at the end I kinda like how it is blotchy and looks like you've done it by hand :) Which is the point of it.


Summary of what you need:

- A t-shirt of your own
- X-acto knife or laser cutter (w/2D Design software)
- A4 paper (slightly thicker than normal paper)
- Sticker paper (optional)
- Tape
- A3 hardback paper
- Paintbrush
- Fabric or acrylic paint

Weeee! Now you have your own shirts! :) Isn't it neat?

x Chi

Thursday, August 8, 2013

New project!

So even though school is near and there's a whole lot of school work to attend to, I've decided to take on a new project, that is re-decorating my room! I have been wanting to do this for ages and I actually planned to do it during the summer but I guess it's a little late. But better than never! :)

So I will be taking you through some of my DIY things that I will be doing to renovate my room. Some of these things will also go into my interior design project which is very exciting as well.

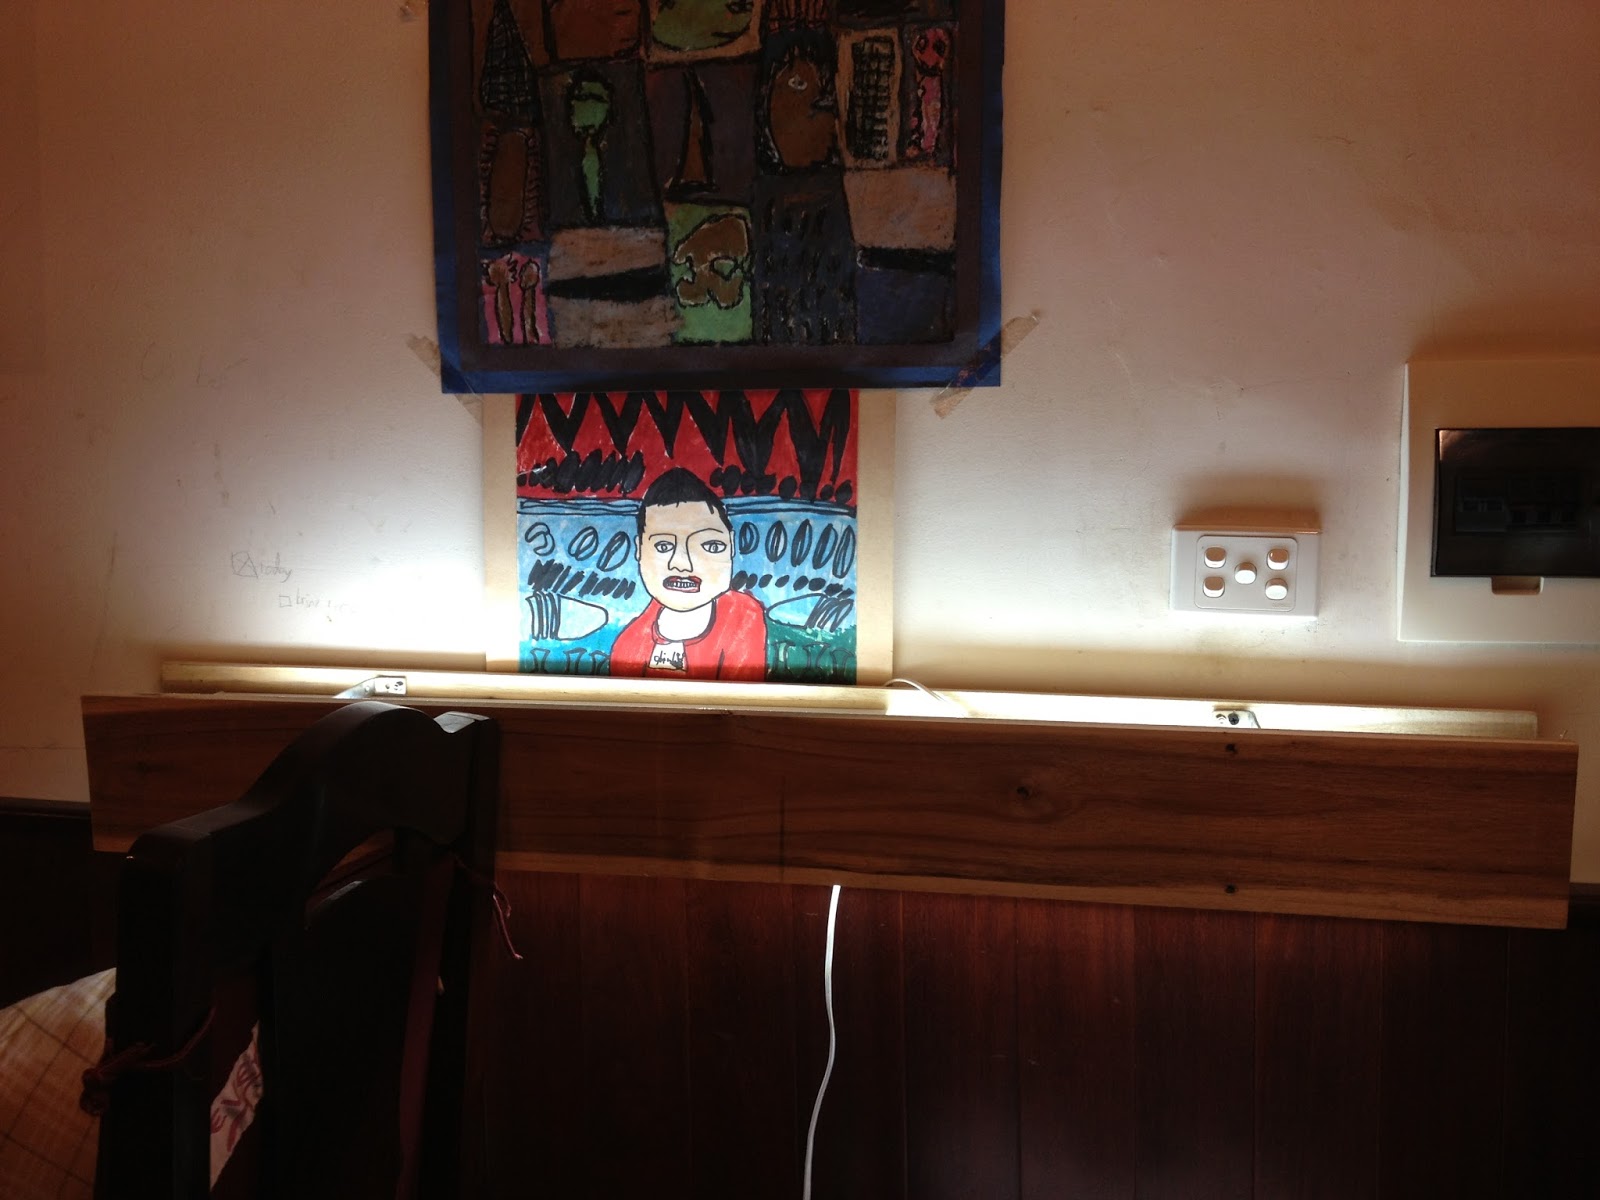
So unfortunately I don't have a complete before picture of my room :( which is silly, but for a little overview my room is quite small, we have two beds (but my brother is old enough now so he moved out of the room), and our walls are incredibly messy because we (me and my brother) when we were younger, put a whole lot of scraps and princesses and pictures and we even drew on the wall with crayons... so it's very messy. The wall is a warm white, but we also have like a wooden half-wall contrast thing, which is sometimes great but I find it quite annoying for some reason.


So right now, this is what it looks like. I only have two artworks so I am only putting those up temporarily (obviously I am not going to have a painting of Alex right there every day to look at in my room). I have some warm christmasy lights up, which I'm not sure this is how I like it but we will keep it there for now.


As you can see... my walls are stained by million sticky tape marks and random crayon circles, the result of a rebelish childhood.

The right hand wall (bigger than the left hand one)
So all day today I've been brainstorming on what I might do to the walls and the room in general. Here are a couple of my ideas so far:

Main wall:

  • "Sleep is good" Light DIY Headboard (idea from here)
  • Christmasy lights (already up, but may be rearranged)
  • Huge rose/flower artwork (idea here)
  • Random typography canvases and maybe some patterned ones
  • Stenciled wall (the one on the left)
  • Places I wanna go to canvases (idea here)
  • Some sort of collage of lots of photos/polaroids & some framed goodness (like this one out of many)

Those are just some of the ideas in my head right now. Also I am going to be creating a Youtube channel with Alex soon... something we decided to do to spice up and make us more committed to each other a little bit haha. For that reason I will also need to organize and find a good place to film my videos and maybe some equipment to help filming as well. Here is a good tutorial for vlogging and such by jacksgap if you're interested.

By the way, I need help to choose a font for the headboard!!! I was thinking Lobster, what do you think?


Tuesday, July 30, 2013

G'day again

Hello again!

It's been super long and I thought I was never going to post again, but because I am extremely bored (I still have lots of stuff to do though) and of course I just love bloggin' so I'm here to interest you with me, my life and I lately.

So it's been summer, woooo and I haven't been up to much except... procastinating. But! I've been doing SOME stuff so don't be too disappointed.

So first of all... my shop was opened! :) It has been opened for quite a while now, sorry I couldn't update on it :( But I first opened a temporary shop because I had a lot of things and wanted to sell them but I didn't quite have a pretty website to go with it (if you know me I'm all about the pretty interface) so I had a temp. one here: http://fretsytemp.tumblr.com/


And then after that... I spent some time at the beginning of summer polishing and trying to release the actual shop. Which has now opened! It's on storenvy now, and jesus christ the coding and stuff was tiring. It's safe to say I am glad I am not a graphic designer... because I suck at coding. Haha!


I love how Storenvy also provides a place for you in the marketplace! It's a lovely site to host your shop for free.
So I am so eager to get it going! I've sold quite a few stuff; the shorts seem to be selling very well. I am planning to expand to selling also some tops and graphics as well. And hopefully accessories when I have the cost to do that.

Bed of Flowers, Fretsy. Pre-order now at $14!
Secondly, there has been a major change in my career path... I am no longer going to be doing math for uni. Instead I am going for design! My parents agreed as it would make me so much happier in life rather than doing math. I am so happy with this decision, and I have been working a lot in researching and trying to build my portfolio for the career route.

After doing a lot of research I decided to do product design, which is a course that suits my interest most. Even though I like interior design more, product design is more efficient I guess for me and my future. I'm also planning to go to England, so I'm looking at a few options for uni over there also.

So speaking about design, I have been building my portfolio, do lots of projects, and during summer I did mostly the shop but also some graphic designing, and I also designed and made a hanging lamp! or chandelier. haha. I will upload pictures and update you soon on that one.


better pictures will be up soon when I come back to school to set up & take 'em!
I also have a few projects going under way. One is a LED Pop art project, another is an interior design project (this one is a bit difficult right now as no one is lending me furniture :'(). I've also got to update my Art book, haha haven't done that in a while (whoops)

Also another big thing that I did during summer was my new album! I recently released an album of 9 songs with 8 that are new, and this album was specially dedicated to Alex Mclean, my LDR boyfriend from Australia. It's his 18th birthday this Friday! Come and have a listen, I have a cool mashup and a few covers and some originals to share! http://chimai.bandcamp.com/


That's all of my news. Oh and! I also received the scripts and everything for the musical already. So excited!

What have you been up to all summer?
-Chi

Saturday, March 30, 2013

Happy Easter!

Hey guys,

It's been a while, but we have been busy again after the school grade level trips. But since it is Easter today I just wanted to do a quick post to tell you guys what I have been up to!

Even though we don't celebrate Easter here in Vietnam, I found these cutest egg DIY's here to decorate your eggs! They may be late but you can just look at them and feel the adorableness.


I am also very keen to try out this DIY block printing - it sure looks amazing, but I bet it's not easy!


So the end of quarter is coming, and lots of stuff are due for us around this time. Which is why we've been so busy, but there are still some things I want to show you.

First, my wire portraiture project has been completed, and I am so happy because it has come out really well. I made two pieces for the series, but I am planning to do more and make it into an installation later in the future.

Below are the pieces (excuse the crumbled white screen!) and at the end of the post is a video I made for one of the pieces.


Top/bottom: "Alek"/"Alek II"
Click here for higher resolution photo.
I am also working on two more projects, one in which is not going to be revealed yet but one will involve decorating a door with beautiful tribal patterns (inspired by tribal clothing patterns of Vietnamese ethnic minorities).


Aren't they beautiful? Photos credit to Wandering Threads.


Door sticker by Artfire - mine will be similar, except it will be on a wooden brown door :)
Anyhow, happy Easter and see you soon :)
-Chi


Hand-bent wire portraits with different perspectives.
Featuring "Alek". Background track: Ellie Goulding - High For This
This is a grade 11 IB Visual Art Studio project.
Chi Mai, UNIS Hanoi. 17/03/13.

Friday, March 8, 2013

Mr Beckham, polaroids, and disappointment

Hi,

Chi here. Haha it has been a while hasn't it? Don't worry, we haven't forgotten about this. I was sick for the past week and I was stuck at home for at least four days. The agony of sickness... it's terrible :( I really don't like being sick guys.

So when I was at home, given the extra time that I had I sat down and did a bit of drawing, and after looking at some of my favourite design blogs I saw some really amazing drawings that were sort of to the more realistic, very detailed-looking side. And they were of people's faces. So after gazing at them for hours I said to myself, why don't I try out doing it? 

So I chose Mr David Beckham, just because his face is hot as hell (but he's getting old, what a shame). This is what I came up with after two hours that night! (Click title to view enlarged version)


"Mr. Beckham" by Chi Mai.
Pencil drawing. 2013.
As the weather is getting better lately, we have been taking a lot of polaroid pictures lately, and I can't help but drool over one of these babies. I know the film is expensive and all, but it is such a good tool to have for instant, in-a-moment memories. I would love to buy one and take millions of pictures with Alex when he gets over. That way I can store the little memories, no?


Right - Fuji Piano Black - Tiara's and this is what we used for photos below
Left - Fuji Instax Mini 7s (white) - what I want


Our favourite picture.
Also a few things happened over the course of last week. I was thinking of doing a student-led musical for next year on Grease alongside with another student-led on Beauty and the Beast since I kind of wanted to make it super good and in my own way as well. Unfortunately, after a few days of seeking approval from the school and talking and mucking around it couldn't happen and I am quite disappointed. There goes my senior year. But oh well, I will chip in and try to help as much as I could with the other musical... although I am not quite sure how Aincre and the group will deal with the whole dancing-teapots and singing-spoons.....

And there were a lot of boys disappointment too... boy, it was miraculous we finally got out of it! T'was worth it, for the short time, *hint hint Abi* and well... it will never happen again. I hope. I really don't want anyone to get hurt :(

Anyhow, that is too much talking for me today. Toodles.
Chi x

Thursday, February 28, 2013

Late update

Hi all,

Sorry for the late update, but last week we went out downtown for some crafty shopping for my parcel to Alex, and also for some relaxing time. 

We went to Gifthaus and this was a gift shop slash crafty place that was really beautiful. It has all sorts of stuff from birthday cards to even home decorations.

Sorry for the pictures - they were taken from my phone and the ones taken on Abi's camera - well, she has them. And if she decides to post them maybe she will... you never know! Double goodie I guess. :)

We had a cinnamon roll at Joma's... yum!
Oh and Hyunsu also joined us for the day. 

It was a really nice sunny day outside as well. :)

Gifthaus, Yen Phu Hanoi.


Can't miss some derp time can we?


My new phone cover! In love with it <3
And finally, we decided to go to lazer tag. It was so fun! Our team won, of course. 
In order:
- Chopper (me)
- Aboobie (Abi)
- The Wall (Tiara)
- Nyun Su (Hyunsu)


Yes, I was the best player! What up. Now you know I'm good at shooting. ;)
-Chi

Tuesday, February 19, 2013

Crafting & some DIY

Me and Abi had a free period yesterday so we spent some time crafting. I happened to find a whole lot of cute pattern printables and was printing them out, cutting them and putting them in good use. Meanwhile Abi, crazed for Melbourne, created a calendar counting down to the day she goes back to Melbourne again. Haha.


Such lovely patterns!


I cut out some patterned paper slips for my jar project that is coming soon....


The wonders you can do with Sharpie...
...well in this case Chinese black felt tip pens thatsuck (on normal paper that is)


As I am also doing a wire project for my art studio work I am exploring what I can do with wire. So below is a little DIY for you and your creative minds.

Basically all you do is have a moderately thick wire that you can bend and reshape (copper, aluminum). Then choosing a template or not you can create name tags, or text ornaments and all that jazz. I've followed these few steps to make Alex a name tag myself:


1. You need paper. yes you do. Unless you are making something super simple and doesn't need a template or guide for your wire. I used tracing paper here, because I was also using an image before. So you can place the image at the bottom and outline using tracing paper and make your stuff, thats good as well.

2. Draw the template. or if you already have, trace it.

3. Using tape and the wire, carefully bend with your fingers or with a plier for tighter corners and shaping the wire like you want. Just use tape that you can actually take out without the ripping paper... for obvious reasons.

4. Then decorate away! I used balls of yarn to roll around my letters and they became super puffy and adorable.

A quick note, if your letter involves an x usually you can work around it with the single wire but this time because I ran out of wire I added another piece instead and glued it on with a glue gun.


Improvise, and see where your creativity may bring you! :)
Good luck,
Chi